A: Stamp finger print ants on the letter A; Paint A with apple slices
B: Make thumbprint bumblebees on the letter B.
C: Glue cheerios on letter C
D: Paint dinosaur feet print on the letter D
E: Egg paint the letter E
F: Finger paint the letter F; Paint the letter F with feathers; Fly Swatter painting; Forest Animals/Frogs/Flowers/Family/Friends/Farm/Firemen/ Fall
G: Glue on glitter to letter G; Ghosts, Goofy Glasses Day; Grass paint letter G
H: Use entire hand to paint letter H; Stamp hearts on H
I: Stamp insects on the letter I
J: Make jigsaw puzzles by cutting up a picture and putting it back together; glue jelly beans on letter J: Read Jack and Jill
K: glued diamonds on letter K
L: Paint over lace on letter L
M: Paint the letter M with marshmallows
N: Painted with noodles on the letter N
O: Glue oatmeal on O
P: Drew pink and purple polka dots on letter P
Q: Paint with Q-tips on the letter Q
R: Glue rice on letter R
S: Glue sand on the letter S; String paint the letter S; Soap paint the letter S; Paint the letter S with sea shells
T: Glue triangles on letter T
U: Draw umbrellas out of U's on the letter u
V: Glue Valentines (hearts) on V
W: Buy fishing worms at an outdoors store and practice forming letter Ww
X: On a black X, draw with white crayons an x-ray
Y: Glue yellow yarn on Y
Z: Draw zigzags on Z or black stripes to make zebra stripes on Z

Friday, September 21, 2012


Thursday, September 6, 2012
Making a Difference Mondays
I haven't posted recent posts about making a difference on Mondays (For me, I like to make a difference every day...otherwise I would have no reason to be a teacher!) This post won't be long, but I wanted to share a couple ways I made a difference in my students lately.
I recently played football with one of my little boys...not just any child...it was that child you fall in love with because you have had multiple 'conversations' about how to act, be others' friends, and to listen, etc. One day at recess, (now starting to become every day) he asked me to throw the ball with him. It was one of those days, I had a little bit of extra energy so I agreed and tossed the football with him....not knowing how much it actually meant to him. Later that day, as we were packing up to go home, that little boy came up to me and thanked me for throwing the ball with him. His words were, "Mrs. Gansman, thank you for taking time to throw the ball with me. I really had fun throwing with you!" Aww the joy that brought to my heart! This is normally that child that hardly ever says something nice and on that day I made a difference just by taking the time to throw the ball with him! Think about those moments that may not mean much to you, but could mean the world to a child and even your own child if you are a parent. Whether it's throwing the ball with a child, pushing him or her on the swing, or playing a game of tag, take that time even if its only for a couple of minutes. You never know when that may be the only time that child has to 'play' or have that 'special' moment with an adult.
Another way I feel I made a difference in one of my student's is by telling her mom about her behavior. I took the time to tell her mom how well behaved she was and how she always tried to follow directions in front of the little girl so she knew I complimented her. I assume later that evening, her mom told her how much that meant to her because the next day, we were packing up to leave again, and this little girl told me, "Thank you for saying that I was a good girl to my mom. That was really nice of you. I liked that." Just another small way of making a difference in one of my students' lives. Take the time to not only tell your parents what their child(ren) did wrong but also be sure to constantly brag on your students and tell their parents how wonderful they are as well! Parents and students alike want to know the positive more than the negative. I had a director at a center I used to work at that instilled in me to always give a positive before and after the negative. I will never forget that and hope to always give as many positives as possible! You never know what child needs the positive word and reinforcement!
I love my students!!!!!!!!!! They are my world...besides for my husband and family of course!!! I thank God often for such a wonderful place to work and for entrusting me with His precious gifts!!!
I recently played football with one of my little boys...not just any child...it was that child you fall in love with because you have had multiple 'conversations' about how to act, be others' friends, and to listen, etc. One day at recess, (now starting to become every day) he asked me to throw the ball with him. It was one of those days, I had a little bit of extra energy so I agreed and tossed the football with him....not knowing how much it actually meant to him. Later that day, as we were packing up to go home, that little boy came up to me and thanked me for throwing the ball with him. His words were, "Mrs. Gansman, thank you for taking time to throw the ball with me. I really had fun throwing with you!" Aww the joy that brought to my heart! This is normally that child that hardly ever says something nice and on that day I made a difference just by taking the time to throw the ball with him! Think about those moments that may not mean much to you, but could mean the world to a child and even your own child if you are a parent. Whether it's throwing the ball with a child, pushing him or her on the swing, or playing a game of tag, take that time even if its only for a couple of minutes. You never know when that may be the only time that child has to 'play' or have that 'special' moment with an adult.
Another way I feel I made a difference in one of my student's is by telling her mom about her behavior. I took the time to tell her mom how well behaved she was and how she always tried to follow directions in front of the little girl so she knew I complimented her. I assume later that evening, her mom told her how much that meant to her because the next day, we were packing up to leave again, and this little girl told me, "Thank you for saying that I was a good girl to my mom. That was really nice of you. I liked that." Just another small way of making a difference in one of my students' lives. Take the time to not only tell your parents what their child(ren) did wrong but also be sure to constantly brag on your students and tell their parents how wonderful they are as well! Parents and students alike want to know the positive more than the negative. I had a director at a center I used to work at that instilled in me to always give a positive before and after the negative. I will never forget that and hope to always give as many positives as possible! You never know what child needs the positive word and reinforcement!
I love my students!!!!!!!!!! They are my world...besides for my husband and family of course!!! I thank God often for such a wonderful place to work and for entrusting me with His precious gifts!!!
Bucket Filling Trophy!!!
For our scholastic book fair this year, each classroom was asked to make a trophy about their classroom's favorite book. Our classroom decided to do a trophy for the story, "Have You Filled a Bucket Today?"
I highly recommend this story to all elementary teachers. It is the perfect story to teach students how to treat others. We decided to make a trophy about this story because we refer to it on a daily basis. My students try to fill their bucket with "Buckaroo Bucks." (wanted to somehow tie it in with my classroom theme which is a western theme this year) When they are 'nice' to other students by helping them pick up their toys, saying kind words, holding the door, etc. they earn a "Buckaroo Buck." In this story, it describes different actions students can do to fill others' buckets. It also explains to students about being a bucket dipper. Bucket dippers are students who say unkind words to their friends, hurts other students, talks out when others are talking etc. When a student fills another student's bucket, they are also filling their own just like if they are being a bucket dipper, they are also dipping into their own buckets.
Below is our finished trophy! My students did an excellent job, don't you think?! I had already cut out hearts for the students to trace and cut. (Excellent fine motor practice!) I then taped each heart to pipe cleaners that I taped inside the bucket to give our bucket trophy the look of 'love' flowing out! We used tissue paper to fill in the bucket and hide the tape. My assistant painted each child's big toe and thumb to decorate the outside of the bucket which says, "Thumb Toe-rrific Bucket Fillers." I give my assistant props for all her help and suggestions on finishing our trophy and making it look so great!!

Sunday, August 19, 2012
Letter Mm Week!
I decided I have more time to post something I have made or seen on Sunday evenings rather than Monday afternoons. So after another long week and planning for next week, I decided to create a detective page for my students. We are working on the letter Mm squares, and colors this week and some of my ideas are:
Having my students walk the M. They will try balancing as the walk the M that is made on the carpet with masking tape. We also do this on a square. (Idea from our preschool teacher at my school)
Students will pretend to be a detective and will have to find items around the room that starts with the letter Mm. Then, they continue as a detective by finding and circling the letter Mm on the page I created below. I hope to make a sheet like this for every letter of the alphabet.(The pictures came from Microsoft word art.)

Having my students walk the M. They will try balancing as the walk the M that is made on the carpet with masking tape. We also do this on a square. (Idea from our preschool teacher at my school)
Students will pretend to be a detective and will have to find items around the room that starts with the letter Mm. Then, they continue as a detective by finding and circling the letter Mm on the page I created below. I hope to make a sheet like this for every letter of the alphabet.(The pictures came from Microsoft word art.)

Students will also turn a block Mm into a mouse. (Idea from: http://storytimekatie.com/2012/06/06/letter-m/)
Art projects besides the mouse M are: using marshmellows to paint the letter M and marble painting.
We also have a box with different items and toys that start with the letter Mm: mouse, mom, Moses, magnets, monkeys, M&M graphs, marbles, microphones, colorful macaroni sorting etc.
Fine Motor/Math Activities: Using toothpicks to punch out letter Mm, 5 Little Monkeys hand motions, sorting shapes and colorful pom pom balls, tracing, coloring, and cutting out square.
Science: We do math and science groups after snack where the students rotate each day to a new group instead of going to every group every day. This week's science activity is making a graph about what color our water will turn when putting two different colors of food coloring in it. They will also have free play/exploring with magnets.
Science: We do math and science groups after snack where the students rotate each day to a new group instead of going to every group every day. This week's science activity is making a graph about what color our water will turn when putting two different colors of food coloring in it. They will also have free play/exploring with magnets.
We have been learning each others' names and will play Name Bingo! Kids love Bingo even if the prize is only a sticker! I have turned almost everything we do in class into a bingo game...shapes, numbers, names, letters, sight words, beginning and ending sounds, etc.
I think this covers most of our morning activities for the week. We are working on the Daily Five with the students in the afternoon. I am working on a post about how we do that in pre-k and preschool and will hopefully have it posted soon! If you would like to know in more detail about our day or any of these activities, leave me a comment. I love comments!
I think this covers most of our morning activities for the week. We are working on the Daily Five with the students in the afternoon. I am working on a post about how we do that in pre-k and preschool and will hopefully have it posted soon! If you would like to know in more detail about our day or any of these activities, leave me a comment. I love comments!
Saturday, August 11, 2012
My Classroom-Made It Monday
I know I am a little late on my Monday post...I have been so busy preparing and planning for my students arrival, I put off writing for a week; however, things have calmed down a little so I decided to share my classroom setup with you! I will include my Monday project that I made last Monday which was also my awesome find at Rural King! Enjoy!


 I found these barrels at Rural King last Monday when I was shopping for fencing for my covered wagon (which I decided not to do since I found these). I was so excited because I knew these would be perfect for my Western theme! I also found a small cow print fleece blanket that I made into a pillow and covering for one of my barrels.

 I used the leftover fleece and an old white sheet from my mother-in-law to make a soft covering for one of my barrels. My mom found pillow stuffing at a used shop that I put inside before sewing it shut. It was perfect for the top of the barrel. (actually the bottom but I turned it upside down to make it like a bench for the students to sit).
 This is a picture of my final reading center! I love it! It's so western and the students have already gotten use out of the barrels! (I did add a cardboard fence to the right for added decorations.) I added my childhood horses and cowboy hat as well as bandanas I bought from Amazon for more decorations! (See close up pictures at bottom of page)

There was a little bit extra room at the end of my numbers so I added my birthday badges up here...cute added area to my western theme!
 Part of my writing center...I feel this is one of my most important centers; therefore, wanted to add several writing utensils for the students use. In the containers above, (free from a teacher I used to work with) I added regular pens, gel pens, skinny markers, fat markers, and pencils for the students to use for writing practice.

 This is an overview of my writing center as well as my sign in area when parents drop off students. I included magnetic board and letters, reading leap pad, several different types of paper and writing utensils, envelopes, stamps, dry erase boards and markers, chalkboards and chalk, and other reading/writing activities and games. The cowboy hat and bandana is used for decorations.
 Art center... I used containers from my wedding as well as target dollar section containers for this center. See my post on western containers for more detail on these containers.I included paper, stamps, rulers, caps and other collage items, stencils, markers, crayons, glue, scissors, colored pencils, play dough, etc. for the students to use.
 This is my dramatic play area. The doll house was given to our classroom by a favorite substitute for my class. I also added a lot of puppets and plastic table that I bought at a yard sale. The stove and fake food was already in my classroom.
 Block and construction center. I added my childhood plastic horses to this center along with tools, a construction hat, and magnetic letters.
 My science shelf...I wanted my science center near a window, but didn't have any shelving so again I used a yard sale special. I bought this shelf last spring for my step son's room. He never really used it so I brought it into my classroom and it worked perfect for this center and matches the chairs! See below!

 This is my math center! This center is def. one of my students favorites this year! They love the markers as well as all the tubs of manips! I have links, shapes, pattern blocks, wooden blocks, unifix cubes, etc. that the students can pull out and take to the table to play and build.


The horse material on the barrel on the right is a blanket I had in my bedroom as a kid. It worked perfect for extra padding on the second barrel!
 This little guy is my Tattle Bear! Oh how I am going to love this little man by the end of the year! When my students feel the need to tattle about something small, they will go to this bear instead of me! They do know, however, that if someone is bleeding or doing something that will get them hurt, they come to me first!
Wow this has been a long post! However, very much worth it! I love sharing pictures of what I am doing in my classroom!!! Hopefully you can use some of the ideas for your classroom as well!


I cut the material into two small squares, cut the edges and tied into knots to connect the two pieces. I put an old pillow in between the two pieces to make a cow print pillow for my reading center.


There was a little bit extra room at the end of my numbers so I added my birthday badges up here...cute added area to my western theme!


 This is an overview of my writing center as well as my sign in area when parents drop off students. I included magnetic board and letters, reading leap pad, several different types of paper and writing utensils, envelopes, stamps, dry erase boards and markers, chalkboards and chalk, and other reading/writing activities and games. The cowboy hat and bandana is used for decorations.


This small round table was given to me by a favorite aunt. It's the
perfect size for my science center. The white shelf was also given to
me and the blue containers were from dollar tree! You can't beat that! I
am so blessed to have people in my life who think about me and my
classroom all the time! I love free and cheap stuff and it's so easy to
find a place for it in my classroom! I included a scale, shells, magnifying glasses (given to me), dinosaur games (also given to me), animal cards, weights, and magnets as well as scientific books for the students to use.


The horse material on the barrel on the right is a blanket I had in my bedroom as a kid. It worked perfect for extra padding on the second barrel!

Wow this has been a long post! However, very much worth it! I love sharing pictures of what I am doing in my classroom!!! Hopefully you can use some of the ideas for your classroom as well!
Saturday, August 4, 2012
Western Bulletin Boards


This board lists my rules for the year. I am planning on having folders with prongs with monthly calendars inside of them. If a student breaks a rule, I will write the number of the rule that was broken on that day's date. If a child has a great day, they will receive a stamp or sticker. Parents will sign their initials each evening when they check their child's folder. These calendars will hopefully help with discipline problems within the classroom by holding parents accountable as well for their child's behavior. It's also great document for parent/teacher conferences.

I love these! They were a last minute decision. I brought them home today after working in my classroom all day. I found a pack of wooden sticks my mom had bought for me awhile back and taped them to the back of the hats. An easy and great way to find a line leader, bucket holder, etc.

This will be our math groups board. After snack, the students' will find which color their name is by and go to that table to work with their group.

An over all look at my bulletin boards!

This board is my daily calendar board. The boots are from google images. After printing and laminating I wrote "Today is," Tomorrow will be," and "Yesterday was" on each boot. I then put blue clips on the yellow paper so the students can slide whatever day goes with each boot. I laminated the horse (from a bulletin board set) and plan on using it to keep track of how many days we are in school. The paper next to the horse is a chart where I will teach the students about tally marks. We will keep track of how many boys and how many girls we have in our class each day. The pennies will be on our board for the month of August. I plan on teaching the students a poem to learn all about the penny. We will recite the poem daily to help them remember it's a penny... never too early to teach about money! In September, we learn about the nickel.
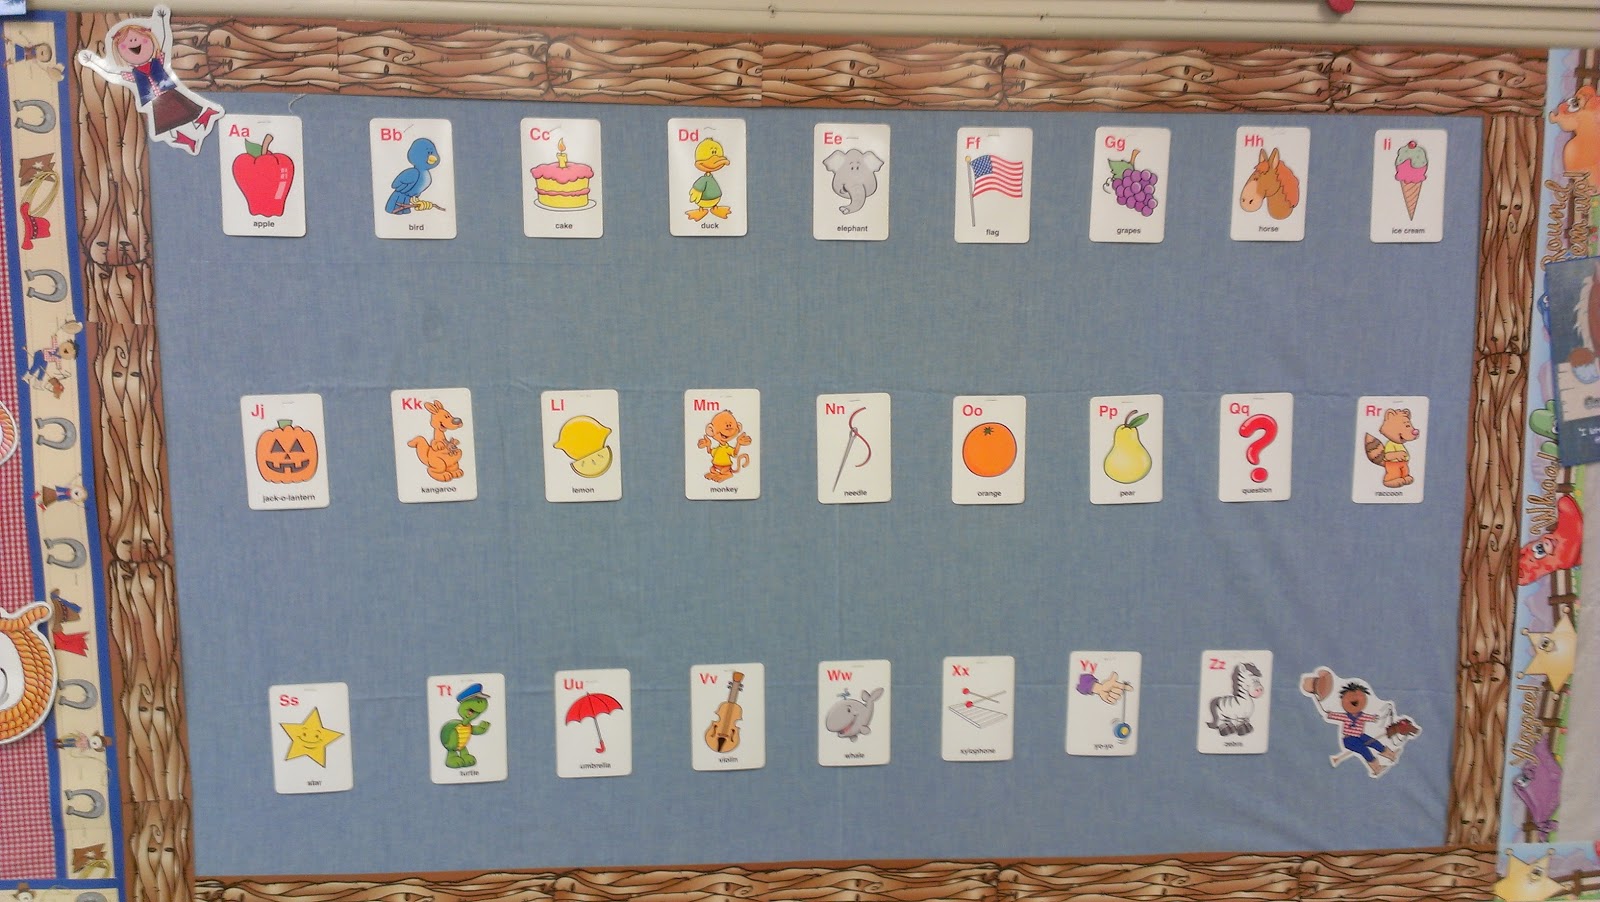
This will be my word wall board! The blue jean material used for this board came from my mom who knew I had been looking for some blue jean material! She found it for a couple dollars at a used shop. I love how my mom always seem to find exactly what I need for my classroom! She even found three bags of pillow stuffing that she gave me to make pillows with! So excited! I love my mom!

This is hanging outside my classroom as a way to greet my students their first day of school! I look forward to meeting all my little buckaroos!

This board will be where the students make their lunch decision as a way of signing in each day. They have to find their name on a horseshoe and then place it next to either their lunch decision, if they brought their lunch or if they are leaving at 11:00.

This is hanging on my door ready to greet my students each day!

This is my reading board. I am still working on this board. Any suggestions?
I also plan on making a covered wagon for my library center. Any ideas on how to do that? I have several ideas running through my head using garden fencing, hula hoops, a white sheet, and either a wagon, table, or cardboard boxes for the actual wagon. I'm going to play around with some of the ideas to figure out what to do! My mom always seems to find what I am needing at thrift shops whereas my mother-in-law always has in storage what I need! She has an old white sheet and a wagon! What are the odds of that?!?! Have I mentioned I love my mother-in-law too?!?! It's wonderful getting good deals and being able to borrow items for my classroom! After all, us teachers need that break with as much money as we spend for our classrooms!
More to come on my classroom soon!
Wednesday, August 1, 2012
Western Containers
 Have I mention I love this part of the year getting things in my classroom ready for my new students. I am not part of a Monday Made It linky party, but I wanted to post something I did tonight that was very simple. I made cute western containers to match my western theme this year. It was so easy, inexpensive, and I can reuse containers year after year. The metal containers were containers I bought at Target's dollar section. (Most were actually bought for my wedding...finally putting them to use again!) The plastic containers were free for me...they were given to me from another teacher! The ribbon was only $1 at Big Lots and the bandanna string was $1/yd at JoAnn Fabrics! I wrapped the string and ribbon around the container, tied a knot, added a little super glue where knot was at and containers were finished! Simple, inexpensive, and cute! I will post pictures of these in my classroom as soon as I finish setting my room up! Can't wait to see how this theme works out! I love my horses and cowboy hats!
Subscribe to:
Posts (Atom)